¶ Prerequisite Information
A Minecraft server requires high clock-speed cores. It is better to have fewer high clock-speed cores than many low clock-speed cores.
I will be virtualizing this server. My host machine has a Quad-core Xeon at 3.2Ghz.
Server specs will depend on how many players are expected to be on the server simultaneously.
These specs are good for 10-15 players (again, simultaneously). If you have more than 15 players, I would bump the allocated memory first then adjust the CPU Cores and Storage as needed.
The below specs are for the actual VM itself, not specific to the Minecraft service that will run on the server, we'll get to that later.
| CPU Cores | 4 |
| Memory | 4GB |
| Storage | 16GB |
| OS | Ubuntu 20.04 LTS |
| Internet Upload/Download | 10/10Mbit/s minimum |
(The server doesn't need quite 10Mbit/s worth of bandwidth, but after you factor in the other things using bandwidth on your network, thats a good minimum to start with)
¶ Installation
After your server operating system (Ubuntu) has been installed, follow these steps.
1. Install Java 16 JDK. Minecraft Java edition, as implied by its name, runs on Java.
Depending on the version of Minecraft being installed, a later version of Java is required. Since I'm installing the latest version of MC, I'll install the latest Java available on Ubuntu.
apt install openjdk-16-jdk2. Install screen. Screen will allow us to open a virtual terminal session, start the Minecraft server, then logout, without killing the server.
apt install screen -y3. Make a new directory for the Minecraft server to run in. At this point (after logging into your Linux server) you should be in your home directory.
mkdir minecraft14. Navigate to the new directory.
cd minecraft15. Navigate to the Minecraft server download page, here.
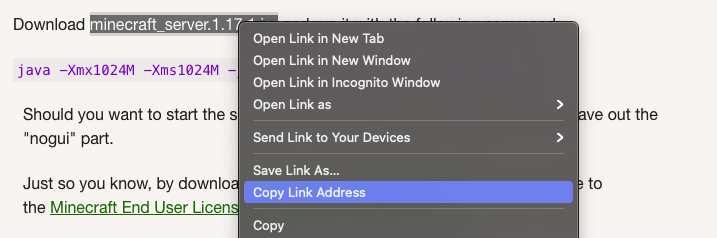
6. Right-click the hyperlink text that is the server .jar file and copy the link address.
7. Use wget to download the server .jar file with the URL we just copied.
wget https://launcher.mojang.com/v1/objects/a16d67e5807f57fc4e550299cf20226194497dc2/server.jar8. The file downloaded is named server.jar. Change the file name to the version of MC server downloaded. In my case, I'll rename it minecraft_server.1.17.1.jar.
mv server.jar minecraft_server.1.17.1.jar9. Create a shell file that will start the Minecraft server.
I will use vim text editor. Nano text editor may work better for a beginner.
vim serverStart.shWith the new file opened, paste the following command:
#!/bin/sh
java -Xmx2048M -Xms1024M -jar minecraft_server.1.17.1.jar noguiThis command tells Java
- -Xmx = the amount of memory to allocate to the Minecraft server.
- -Xms = the initial memory allocation pool.
- -jar = the jar file to use
- nogui = don't try to open the Minecraft server's GUI when starting the sever.
10. Allow the shell script to be executed.
chmod 744 serverStart.sh11. Start the MC server for the first time.
./serverStart.shThe server will fail to start because you haven't accepted the EULA yet.
12. Open eula.txt and change false to true on the bottom line.
13. Start the MC server again. It will now generate the server files.
14. Once the server says something like -
[Server thread/INFO]: Done (25.807s)! For help, type "help"
use Control-C to stop the MC server.
- Use
ls -lto see the files inside the current MC server directory
¶ Configure
The Minecraft server is now installed.
1. Open server.properties to modify the Minecraft server settings.
vim server.propertiesMarked are some of the settings that may be especially important to you. There are other settings that I did not comment on that you may want to modify as well - most are self explanatory.
#Minecraft server properties
#Tue Jul 20 15:20:38 UTC 2021
broadcast-rcon-to-ops=true
view-distance=10
enable-jmx-monitoring=false
server-ip=
resource-pack-prompt=
rcon.port=25575
gamemode=survival
server-port=25565  <----- IF you would like to run multiple Minecraft servers on the same machine, you must use a different/unique port on each one. Start by incrementing by one port number. (25565, 25566, 25567, etc)
allow-nether=true
enable-command-block=false
enable-rcon=false
sync-chunk-writes=true
enable-query=false
op-permission-level=4
prevent-proxy-connections=false
resource-pack=
entity-broadcast-range-percentage=100
level-name=world  <----- this is what the world's directory will be named
rcon.password=
player-idle-timeout=0
motd=A Minecraft Server  <----- The MOTD that will show up on the server listing inside the Minecraft client.
query.port=25565
force-gamemode=false
rate-limit=0
hardcore=false
white-list=false  <----- When set to 'false', anyone can join the server. When set to 'true', only players on the whitelist can join the server.
broadcast-console-to-ops=true
pvp=true
spawn-npcs=true
spawn-animals=true
snooper-enabled=true
difficulty=easy
function-permission-level=2
network-compression-threshold=256
text-filtering-config=
require-resource-pack=false
spawn-monsters=true
max-tick-time=60000
enforce-whitelist=false
use-native-transport=true
max-players=20
resource-pack-sha1=
spawn-protection=16
online-mode=true
enable-status=true
allow-flight=false
max-world-size=29999984¶ Adjust your firewall
Depending on what flavor of Linux you chose to use, there may or may not be a firewall already running on your machine. (iptables (UFW, firewalld, etc.))
I like to use UFW for iptables.
To allow traffic destined for the Minecraft server service through the local system's firewall wall on port 25565:
(This command must be issued by root by either logging in as root or using sudo)
ufw allow from any to any port 25565 proto tcpWhat this says is allow traffic, from anywhere (anywhere external to this computer itself), to anywhere (which is this computer), on port 25565, using protocol tcp (which is what the minecraft multiplayer service uses).
¶ Start the Server
1. Open a screen instance. screen will be used to keep the server running in a detached shell.
screen -S mc-server2. Navigate to the Minecraft server directory if you're not already there.
3. Start the Minecraft server with the start script.
./serverStart.sh4. Detach from the screen instance using the key combination: Control+a, d (that is - Control+a, release, then press d)
To reattach to the screen instance:
screen -r mc-server¶ Allow Players on the Server
Add yourself (and other players) to the server whitelist and optionally the ops list.
whitelist add [payer-name-here]
op [player-name-here]Congratulations! You have setup your Minecraft server and can now join it on your local network. Keep going to expose the Minecraft server to the internet so that other's may join from outside your network.
¶ Make the Server Publicly Available
This doesn't mean to allow just anyone to join your server. Setting a whitelist will limit who can join.
We want to expose the Minecraft server to the open internet to allow your friends to join the server; this will be accomplished with port-forwarding.
Side Note: The Minecraft server must be able to reach the internet. Your Minecraft server will authenticate players with Mojang's account servers when they attempt to login. This likely isn't an issue for a majority of users.
¶ pfSense
The internal/private IP address of the computer/VM that the Minecraft server is running on will be needed to complete this step - have it noted down.
1. Navigate to Firewall → NAT → Port Forward
2. Select the up arrow 'Add’ button.

3. Configure your Port Forwarding rule as follows:
- Interface: WAN - This is the interface that the forward will operate on
- Protocol: TCP - Minecraft uses TCP
- Destination: WAN Address - This is whatever address you have on your WAN interface - what your ISP assigned to your firewall.
- Destination port range: 25565 - This is the port the firewall will listen to on the WAN interface.
- Redirect target IP: [IP address of your MC server]
- Redirect target port: 25565 - This is the port the firewall will forward traffic to on the server.
- Description: Minecraft Server - Set whatever description you want so that you know what the rule does.
- Filter rule association: - Leaving this as ‘Add associated filter rule’ will do the job, unless you'd like to manually create the firewall rule.

Select ‘Save’.
4. Back on the ‘Port Forward’ page, select ‘Apply Changes’ to enable the new rule.
Also, if you look at the WAN firewall rules, you should see the new rule that was created by the NAT rule.

¶ Done!
Your server should now be accessible via the open internet. When external clients want to connect to your server, they need to enter your public IP address (your WAN address) to the ‘Server Address’ field in their MC client.